
1 Export the certificate from the browser
2 Import the certificate as a trusted root
2.1 Open the Windows certificate manager
2.2 Run the Certificate Import Wizard
3 Verify the connection
4 Notes
Introduction
Many Oracle E-Business Suite environments, and the APEX, ORDS and other internal web applications around them, run on HTTPS with a self-signed certificate rather than one issued by a public certificate authority. The connection is encrypted, but the browser cannot verify who issued the certificate, so every user sees a Your connection is not private page with the error NET::ERR_CERT_AUTHORITY_INVALID and has to click through it each time.
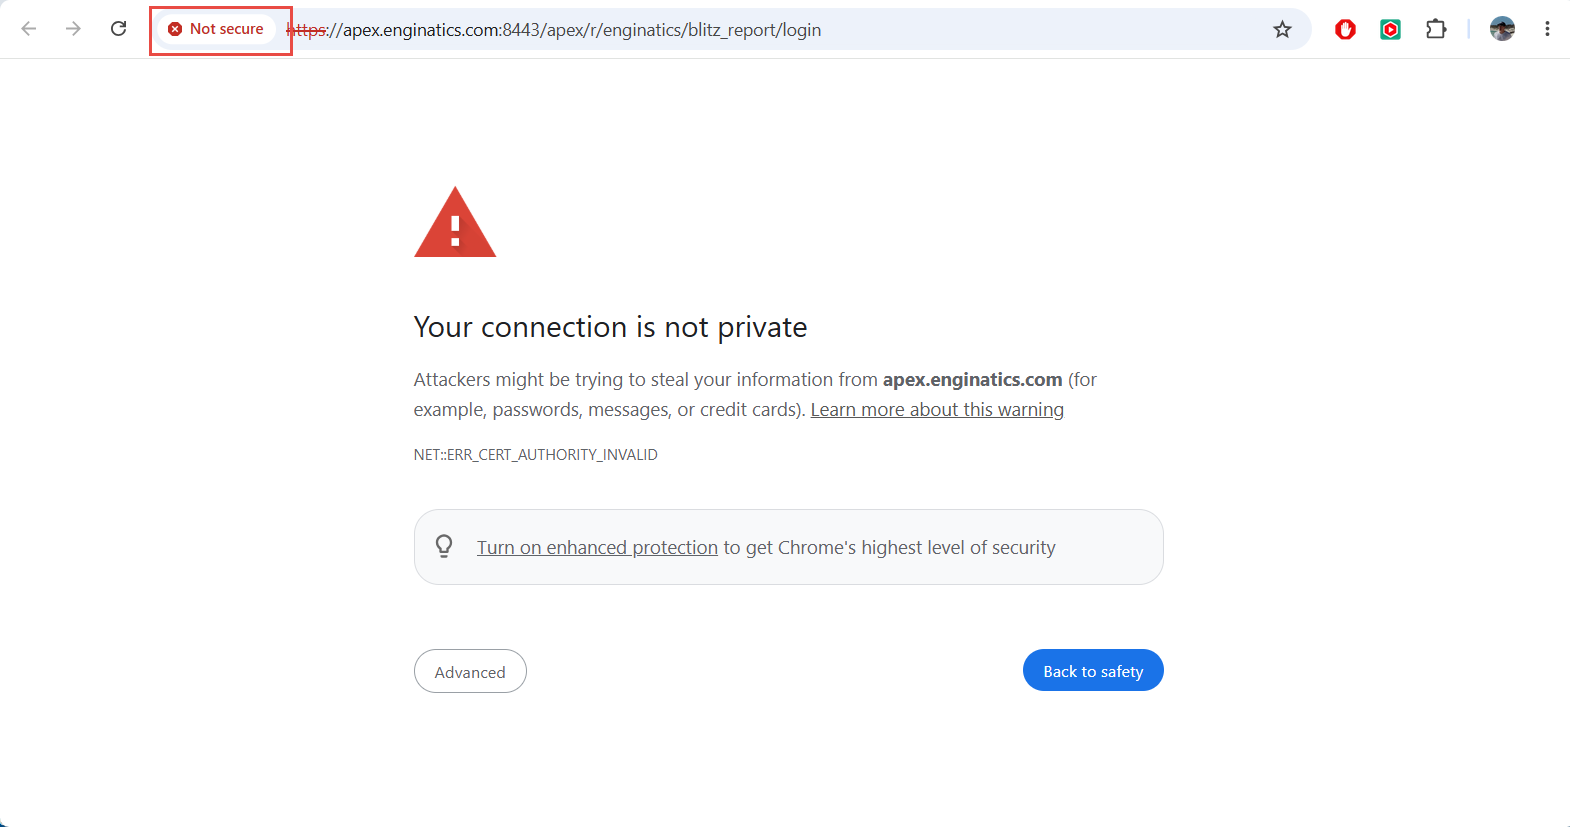
The warning goes away once the certificate is imported into the Windows trusted root certificate store. This post shows the steps in Google Chrome on Windows 11, using our APEX server apex.enginatics.com as the example. Microsoft Edge reads the same Windows store, so the import covers Edge as well.
1 Export the certificate from the browser
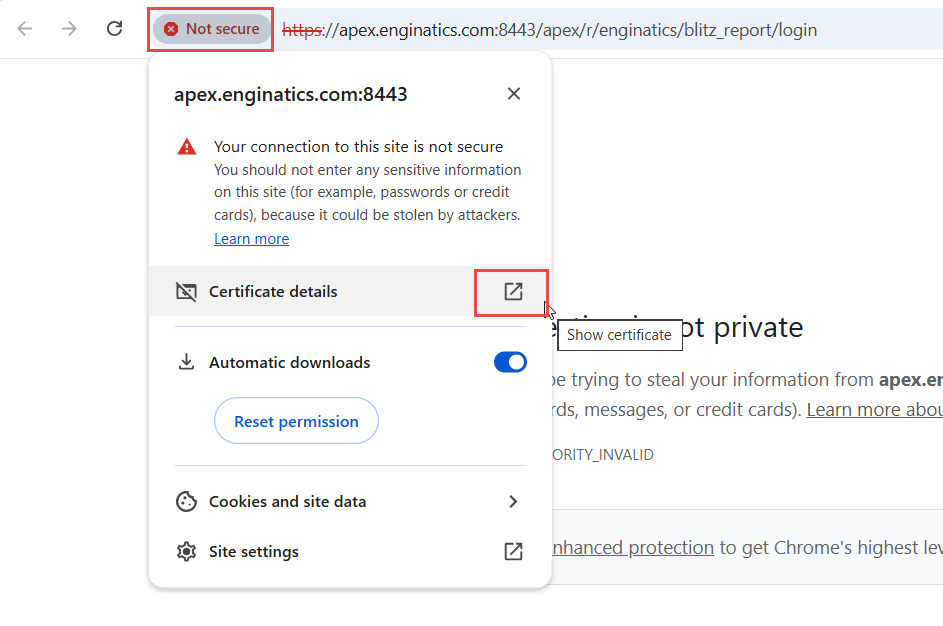
Open the application URL, click Not secure to the left of the address and click the icon next to Certificate details.
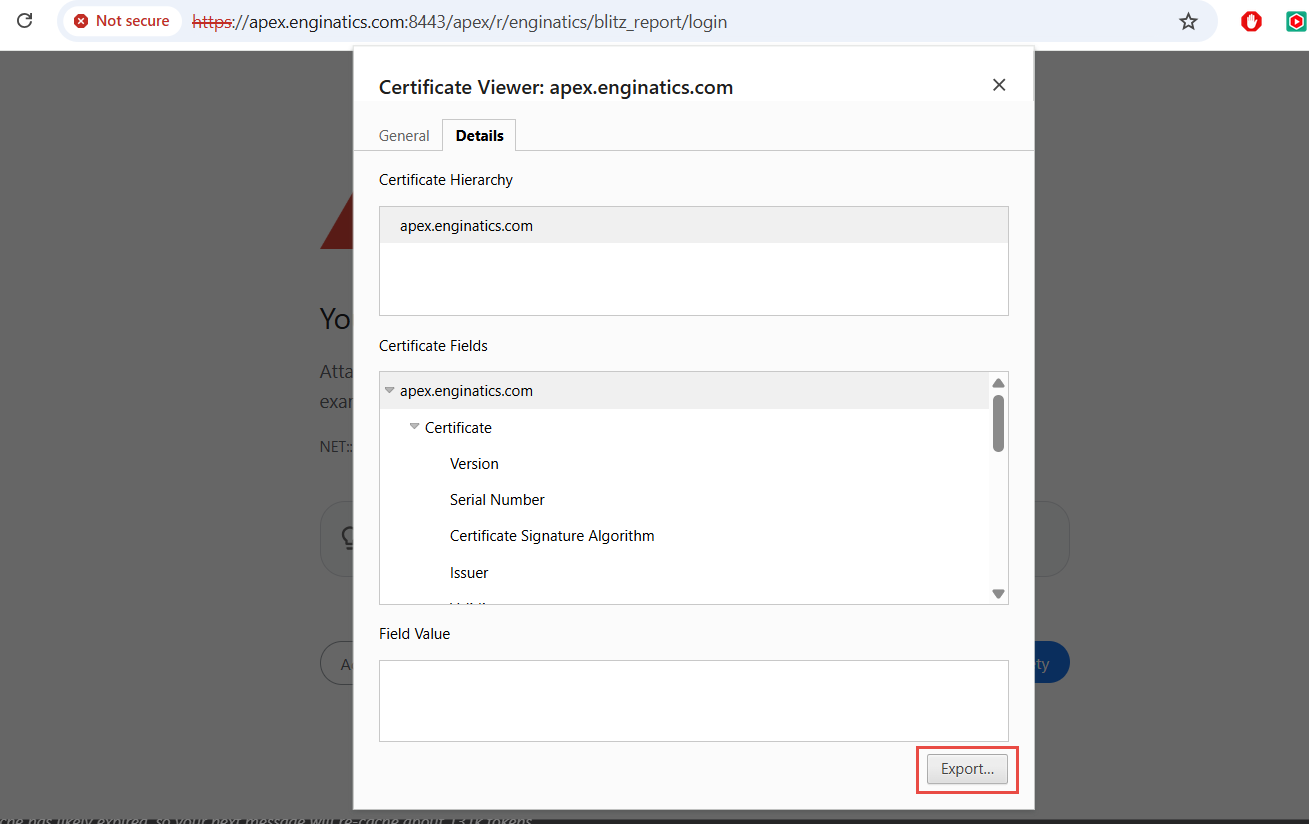
In the Certificate Viewer, open the Details tab and click Export….
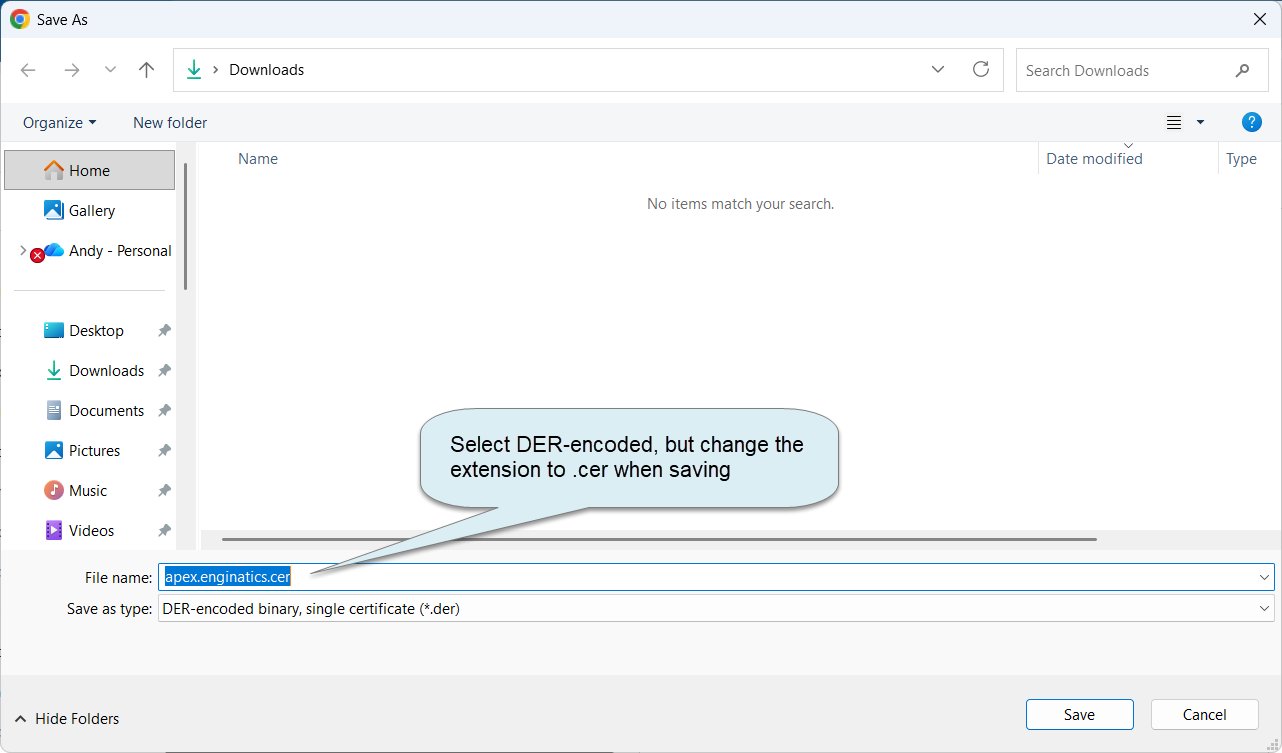
Select DER-encoded binary, single certificate as the file type and change the file extension from .der to .cer, so that the Windows import dialog lists the file.
2 Import the certificate as a trusted root
2.1 Open the Windows certificate manager
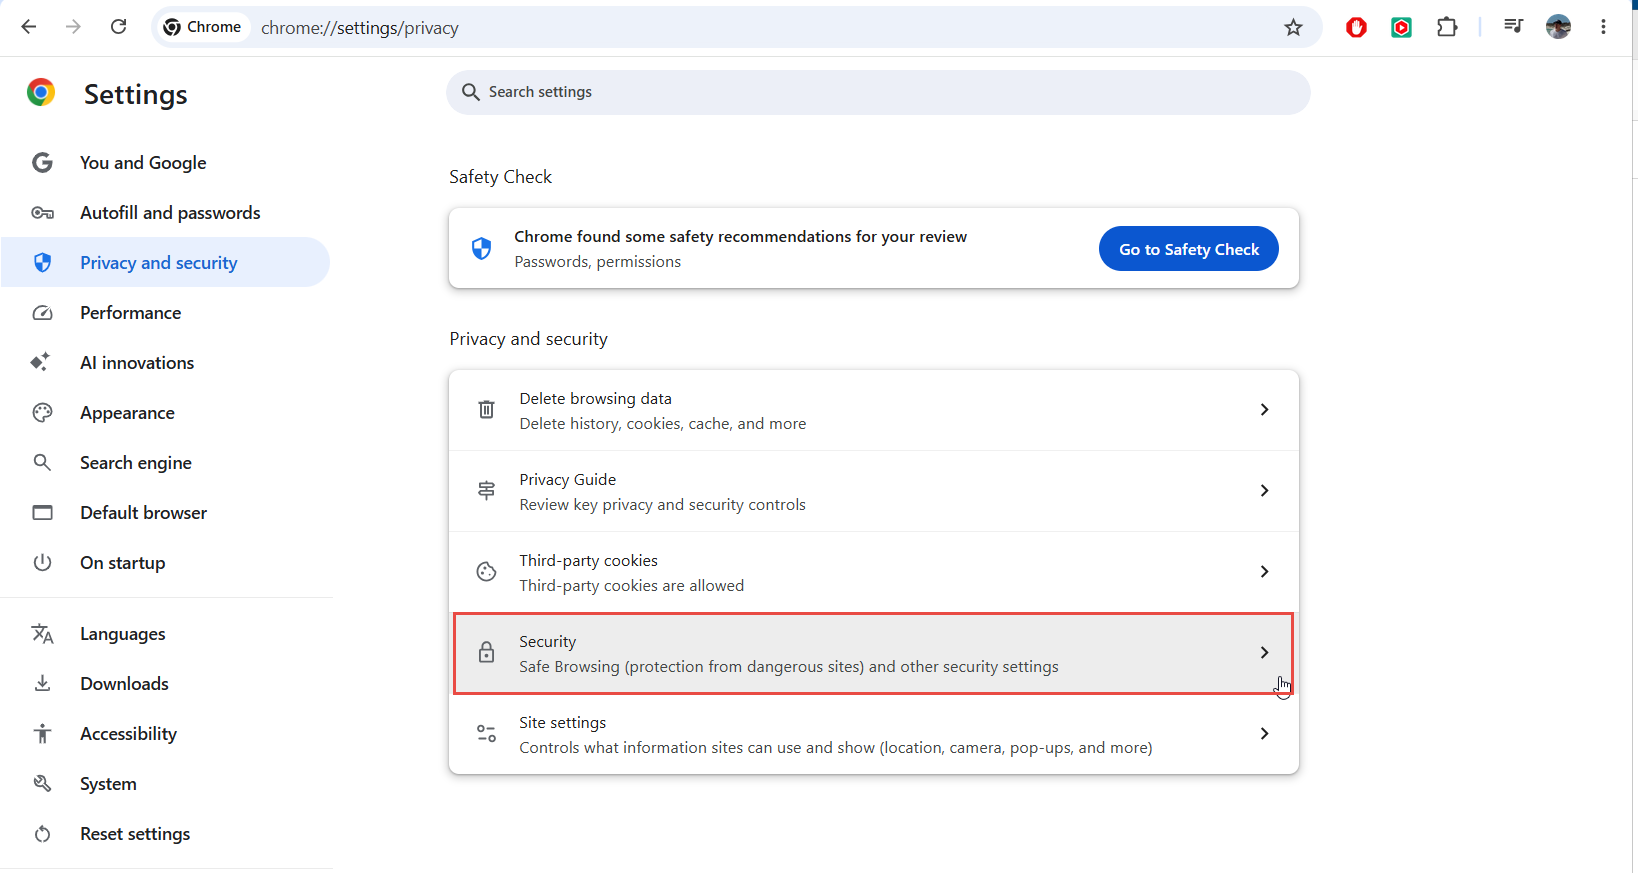
In Chrome, open Settings > Privacy and security > Security, or enter chrome://settings/security in the address bar.
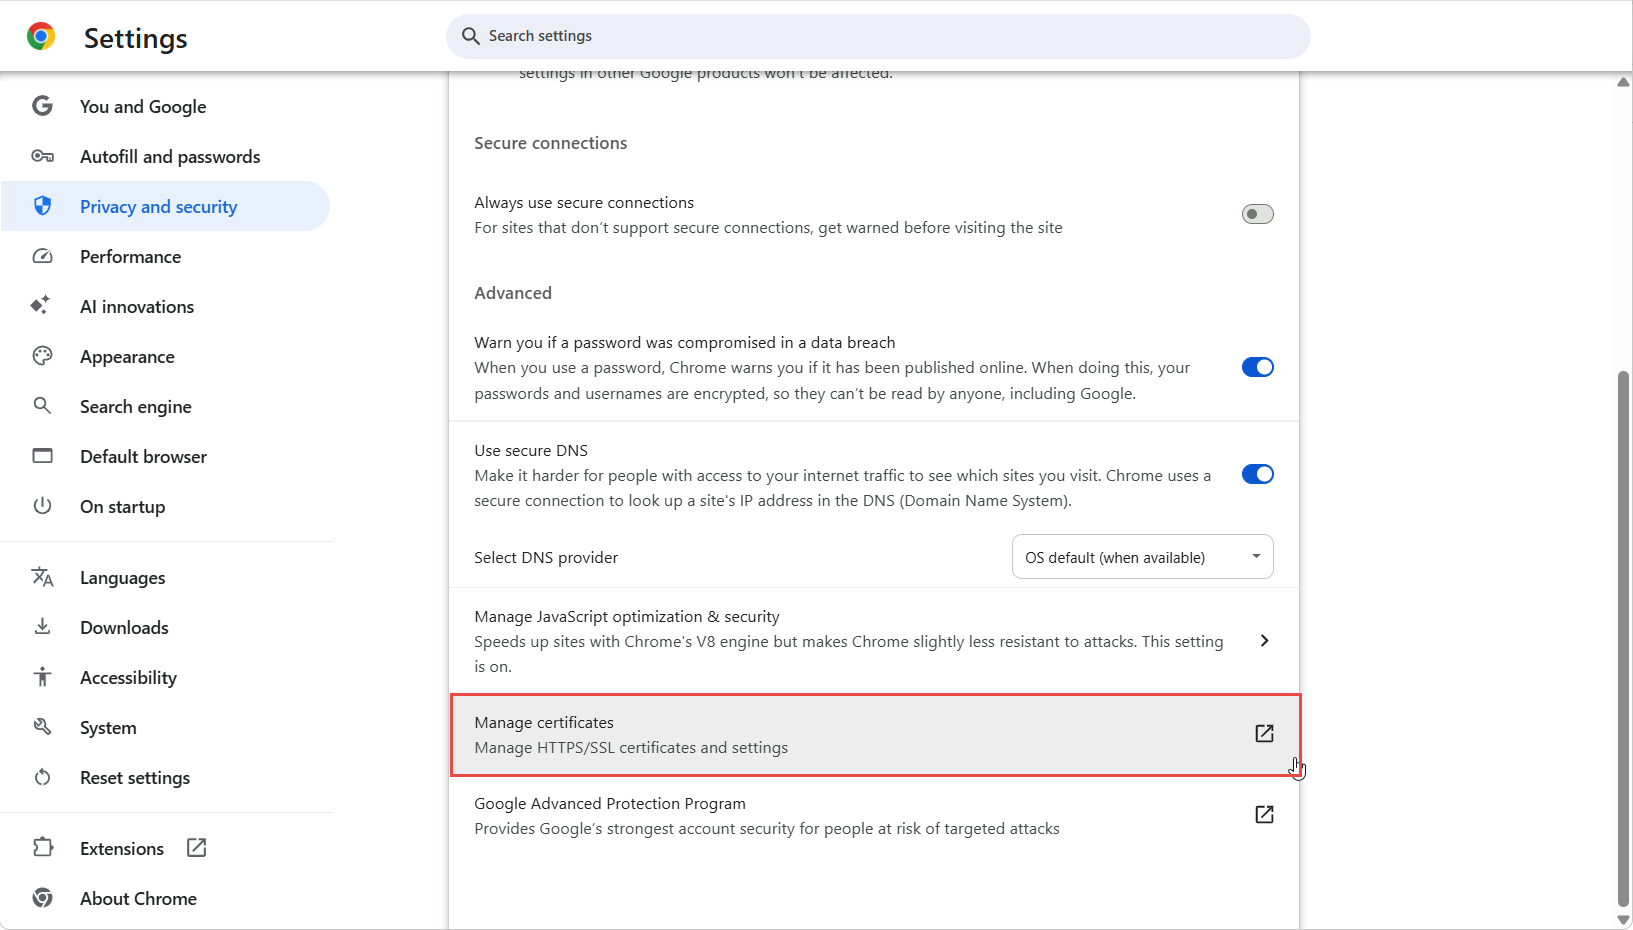
Scroll down to Advanced and click Manage certificates.
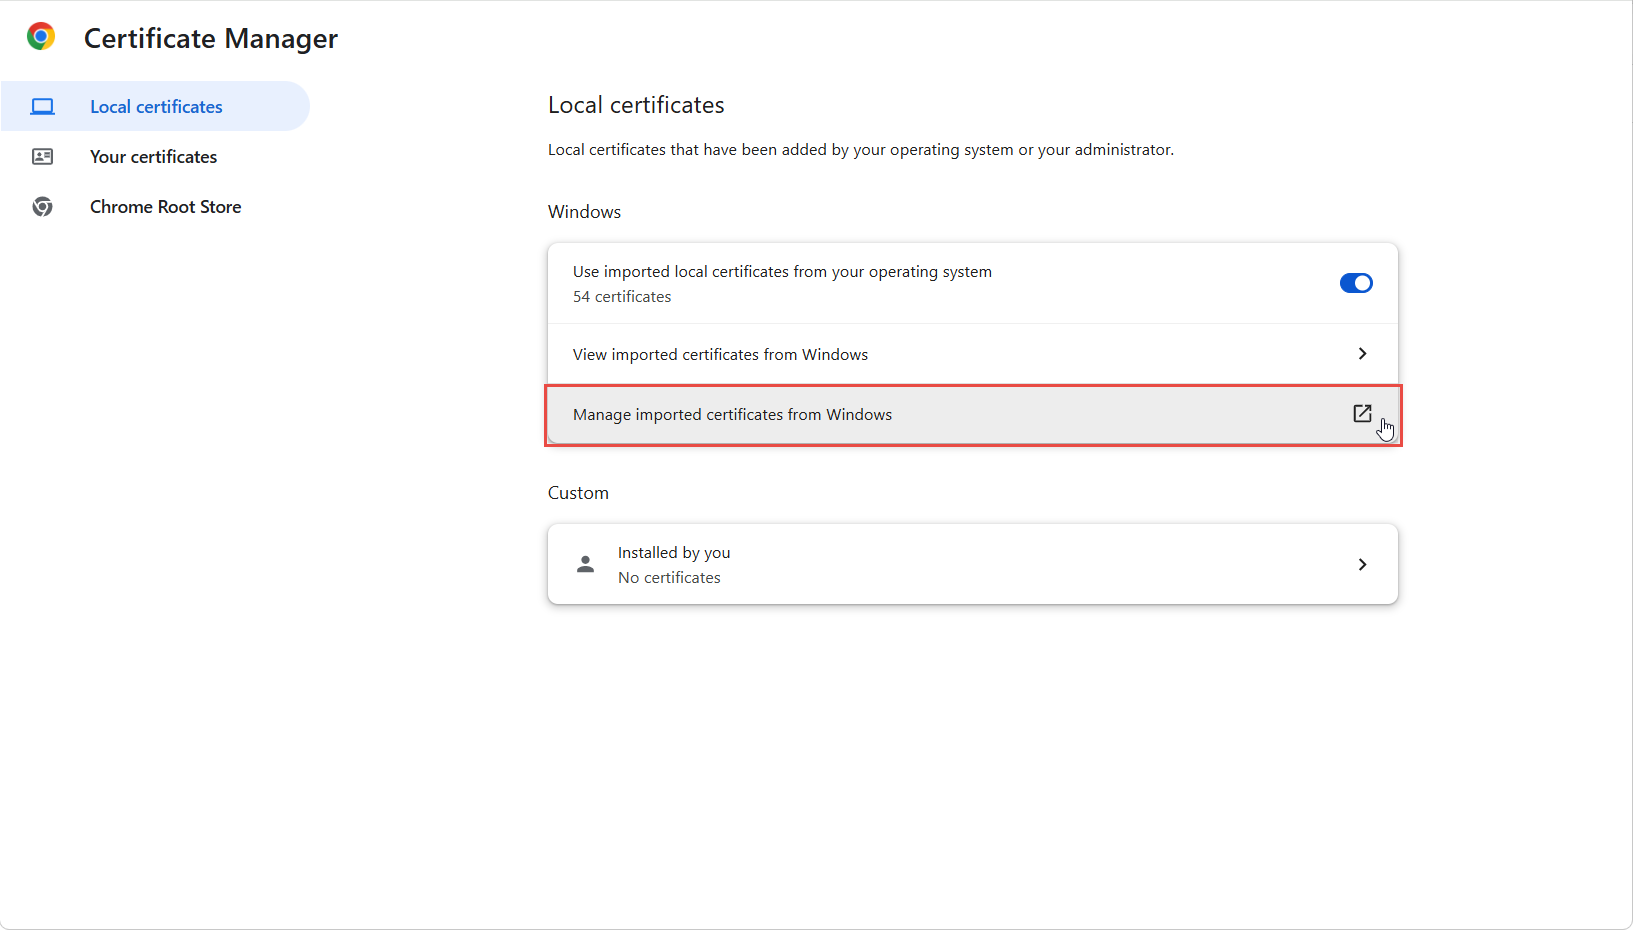
In the Certificate Manager, click Manage imported certificates from Windows. This opens the Windows Certificates dialog.
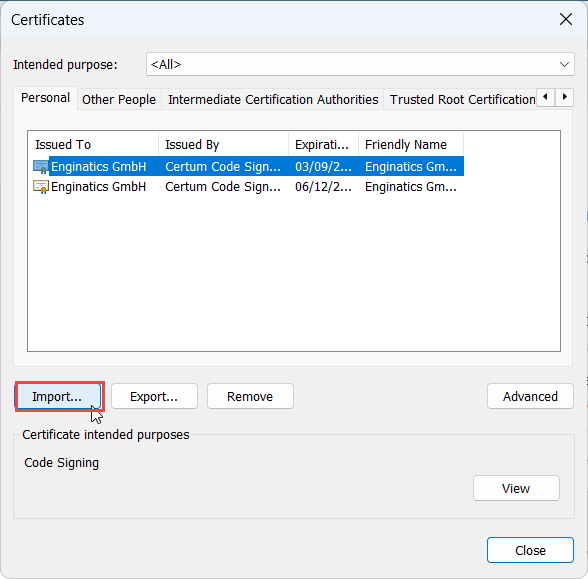
Click Import…. The dialog opens on the Personal tab, but the store is chosen in the wizard that follows.
2.2 Run the Certificate Import Wizard
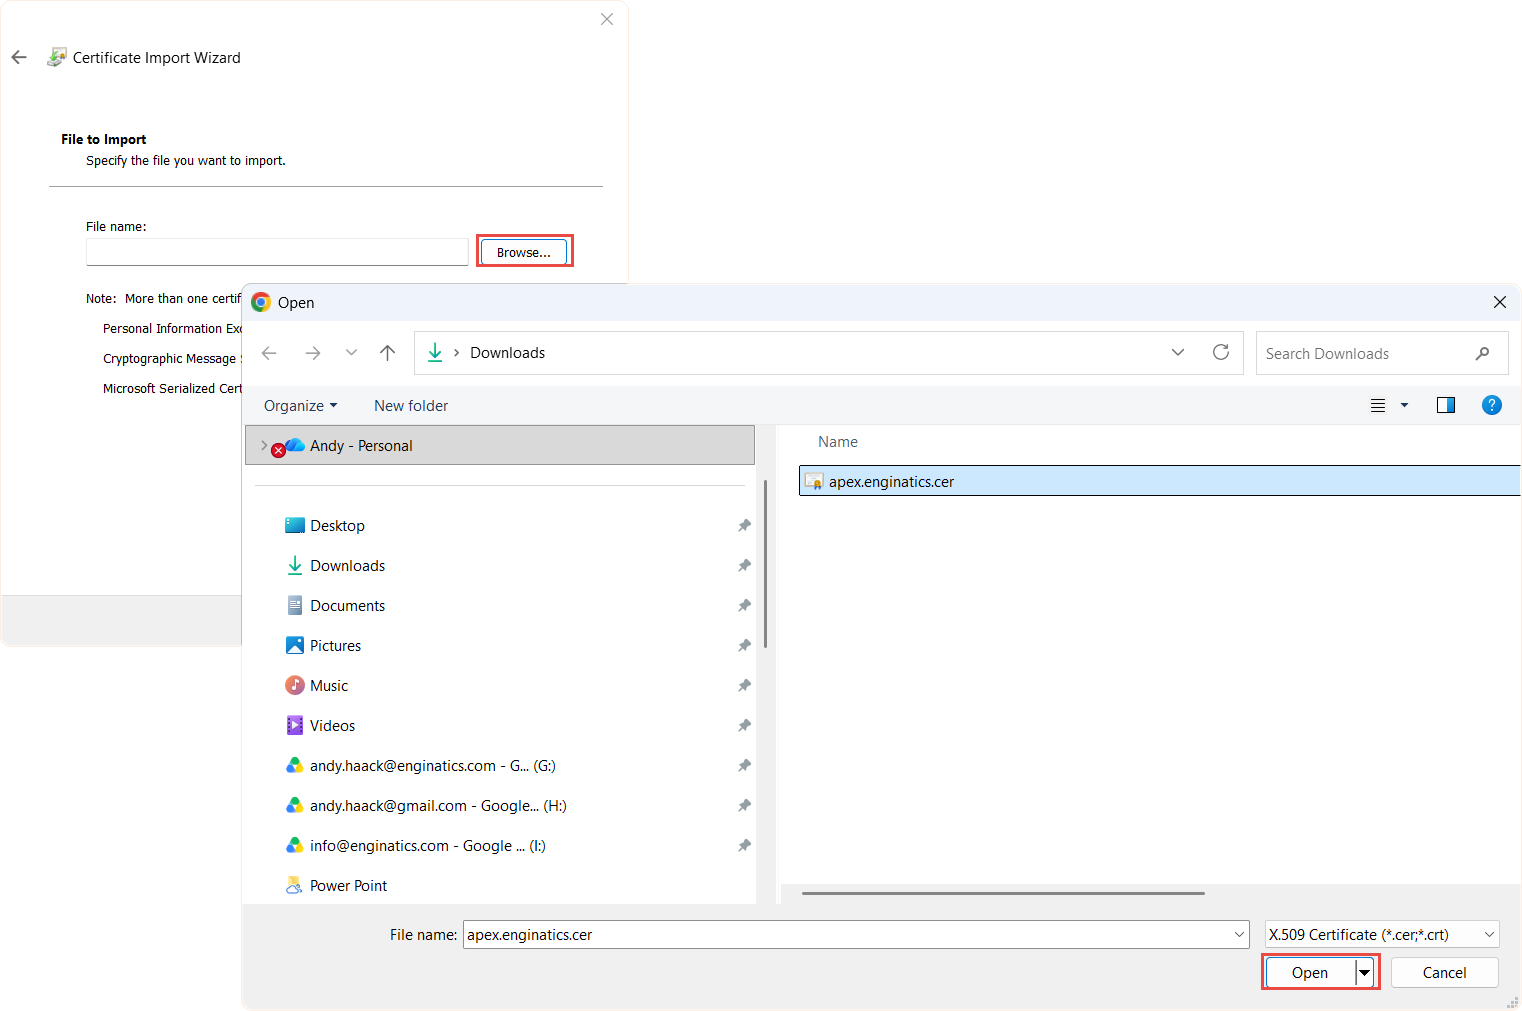
On File to Import, click Browse… and select the .cer file you saved.
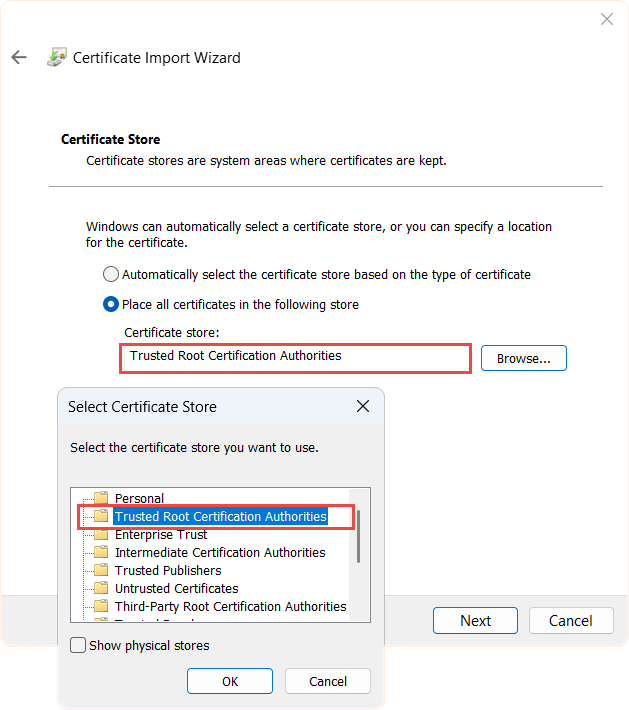
On Certificate Store, select Place all certificates in the following store, click Browse… and choose Trusted Root Certification Authorities. The browser only trusts the certificate from this store.
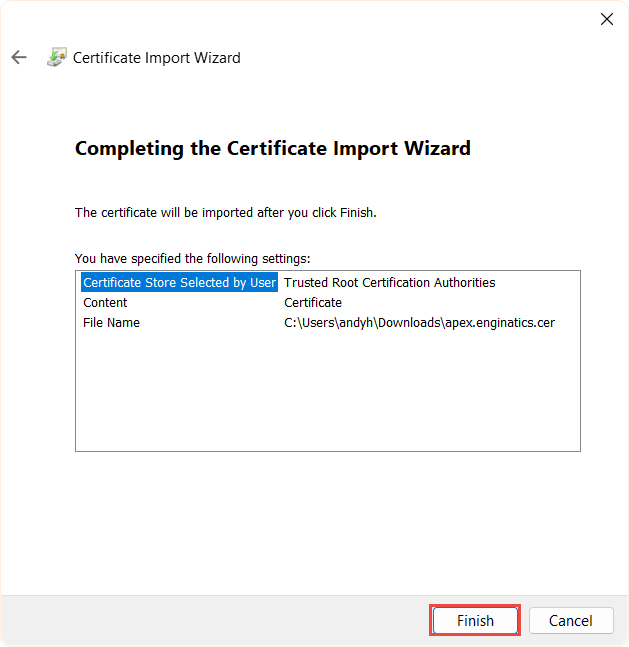
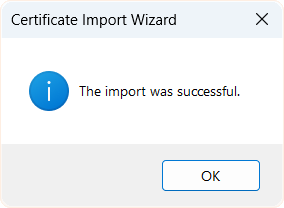
Check the settings and click Finish.
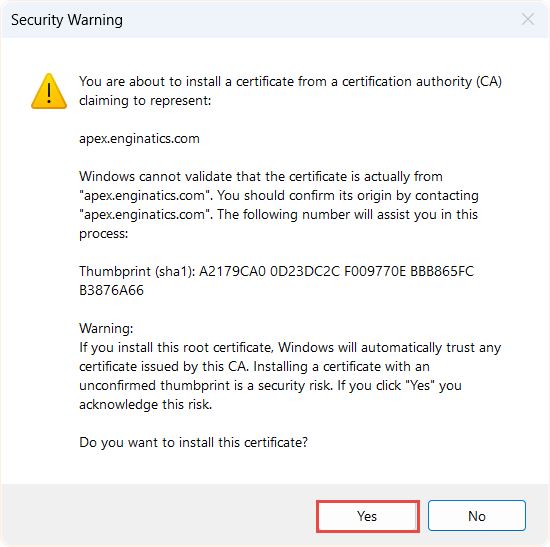
Windows asks for confirmation and shows the certificate’s SHA-1 thumbprint. Compare it with the thumbprint from your server administrator, or with the one on the General tab of the Certificate Viewer on a machine you trust, then click Yes.
3 Verify the connection
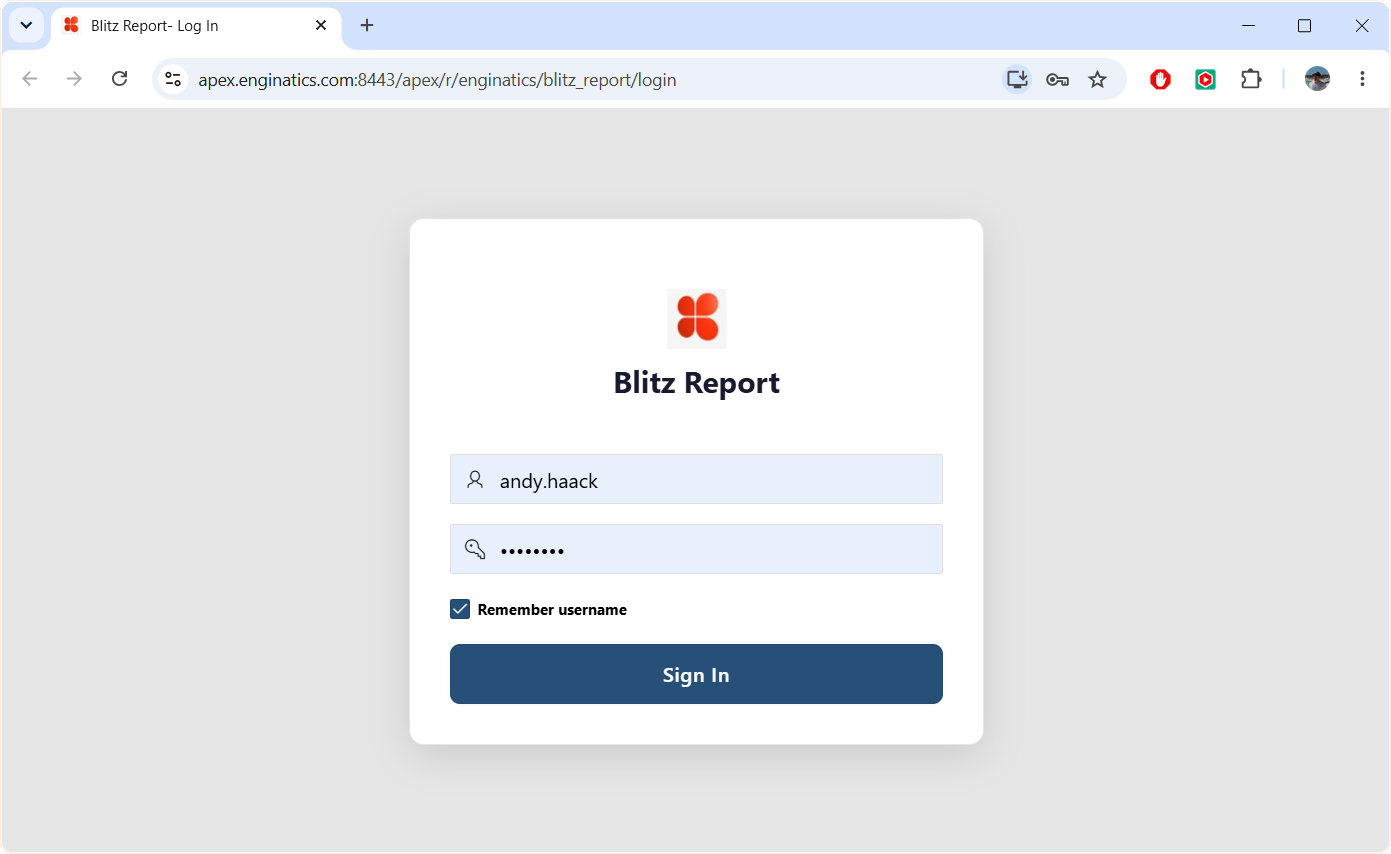
Close all Chrome windows and open the application URL again. The page loads without the warning, and the address bar shows the site information icon instead of Not secure.
4 Notes
- Host name. Open the application with the host name the certificate was issued for. Chrome checks the Subject Alternative Name field, so a URL using the IP address, a short host name, or a certificate carrying the name only in the Common Name still fails, now with
NET::ERR_CERT_COMMON_NAME_INVALID. - Firefox keeps its own certificate store. Import the file under Settings > Privacy & Security > Certificates > View Certificates > Authorities, or set
security.enterprise_roots.enabledtotrueinabout:configso that Firefox uses the Windows store. - Many users. The import above applies to the current Windows user only. To roll the certificate out to all PCs, distribute it with a group policy under Computer Configuration > Policies > Windows Settings > Security Settings > Public Key Policies > Trusted Root Certification Authorities.
- Renewal. When the server certificate is regenerated, the new one has to be imported again.
If you have questions about running Blitz Report on your EBS environment, please contact us.