
FND User Upload

Description
FND User Upload creates and maintains Oracle E-Business Suite user accounts and their direct responsibility assignments from Excel. Each row holds one user and one responsibility, so a single file can create new users, reset passwords, change descriptions, end-date accounts, and grant, re-date or end-date responsibilities. Users can optionally be linked to an existing employee, or have the employee record created with the account. Downloaded without changes, the file is also a list of users and the responsibilities they hold.
When to use it
- Create many new user accounts with their responsibilities in one pass.
- Grant additional responsibilities to existing users, or change the start and end dates of existing assignments.
- Create a new user with the same responsibilities as an existing one.
- End-date user accounts or individual responsibility assignments.
- Set or reset passwords in bulk.
- Link user accounts to employees, or create the employee together with the account.
- Review all users and their responsibilities in Excel.
Before you start
- The upload is assigned to the Users window (System Administrator: Security > User > Define). Opened from there, the User Name parameter is filled with the user on the screen.
- The responsibilities you assign already exist. The Responsibility Application column holds the application short name (for example INV or PO) of the responsibility’s application.
- To link or create an employee, you know the Business Group, and the Person and Employee Number exist in it.
- Passwords you set meet your instance’s password rules.
Step 1 – Set the parameters
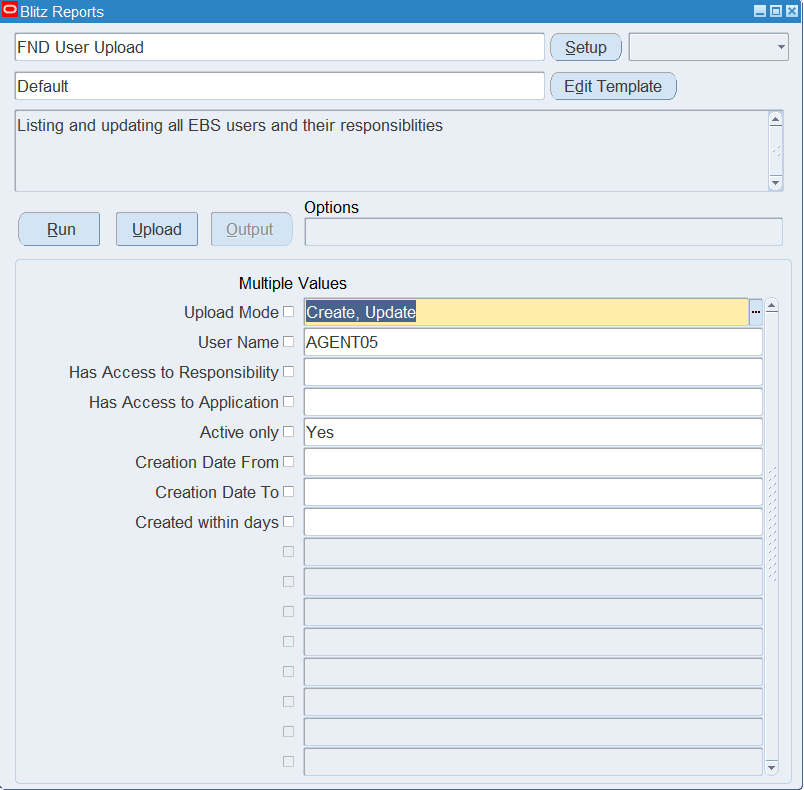
Open FND User Upload in Blitz Report and set the parameters:
| Parameter | Meaning |
|---|---|
| Upload Mode | Create opens an empty sheet for new users; Create, Update (default) downloads existing users and their responsibility assignments for editing and lets you add new rows. |
| User Name | Downloads one user. |
| Has Access to Responsibility | Downloads the users who hold this responsibility, directly or inherited. |
| Has Access to Application | Downloads the users who hold any responsibility of this application. |
| Active only | Yes (default) downloads only active users and their active responsibility assignments. |
| Creation Date From / To | Downloads the users created in this date range. Creation Date To defaults to the end of the From month. |
| Created within days | Downloads the users created in the last number of days. |
The download filters apply in Create, Update mode only.
Step 2 – Run to download the Excel file
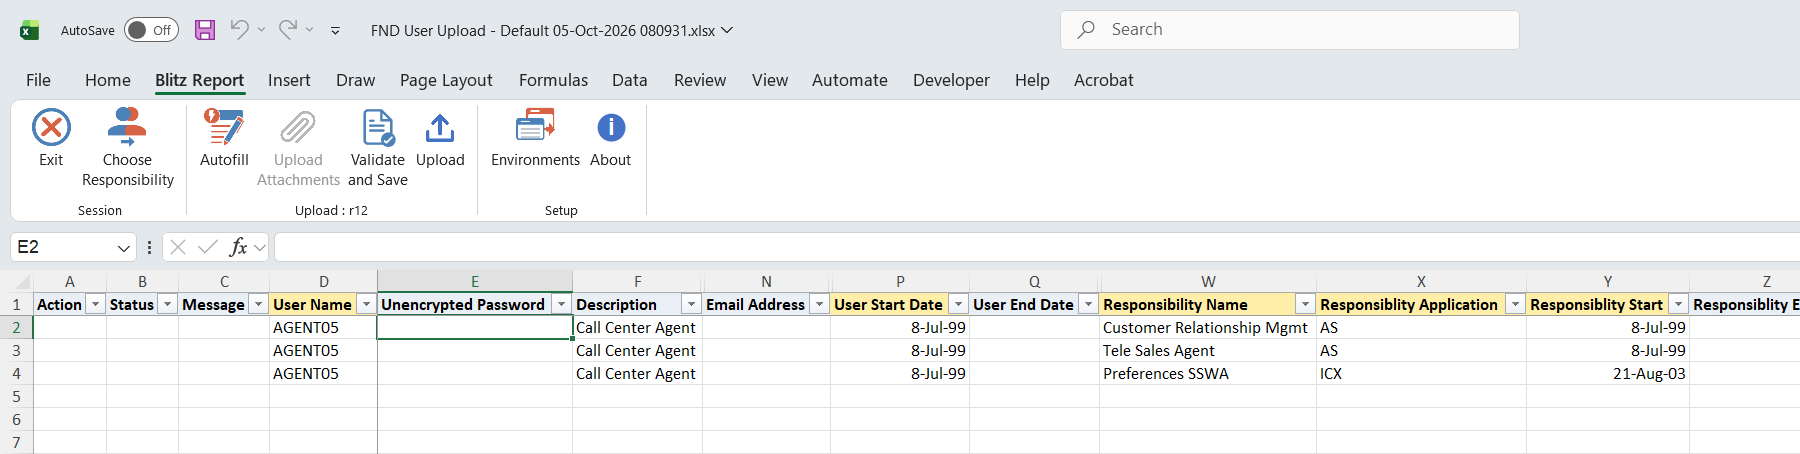
Click Run. The Excel file downloads and opens with one row per user and direct responsibility assignment, or one row for a user without responsibilities. The Unencrypted Password column is always empty in the download.
Step 3 – Enter or change the users and responsibilities
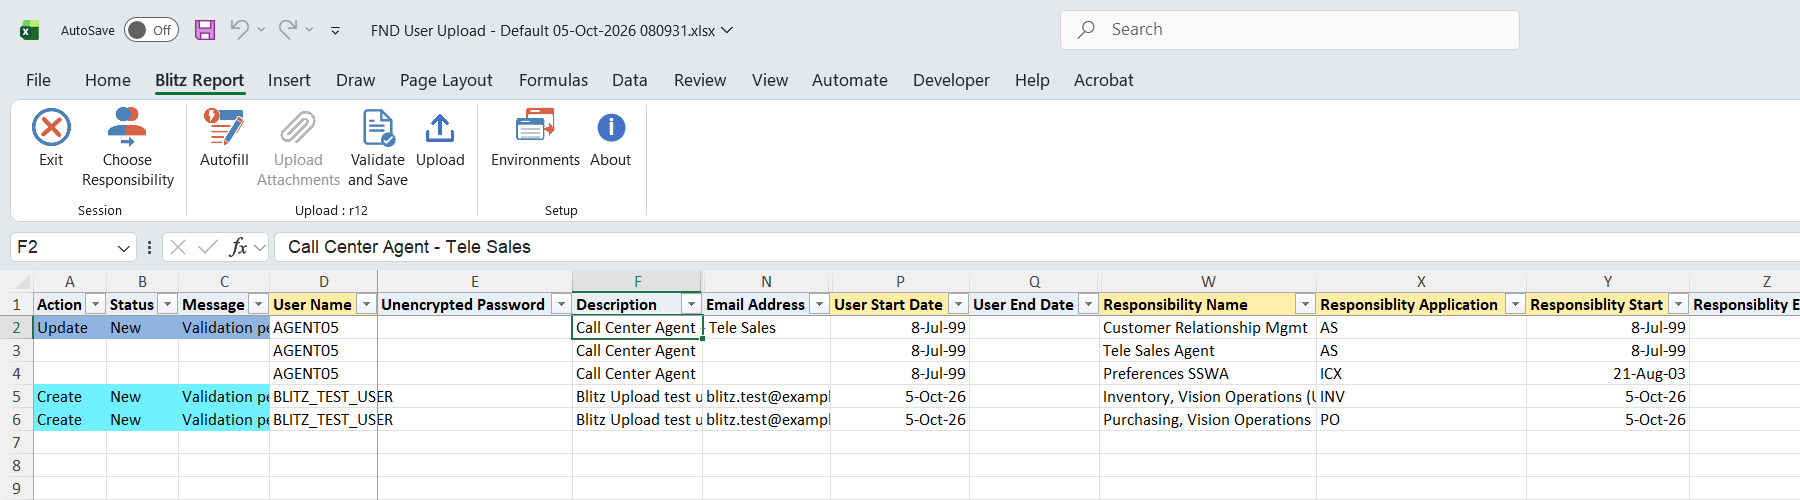
Each row is created or updated depending on whether the User Name exists; you do not choose the action. User names are stored in upper case. A new user needs User Name, User Start Date, Responsibility Name, Responsiblity Application and Responsiblity Start (defaults to today); add Description, Email Address and Unencrypted Password as needed. A new user without a password gets no local password and cannot sign in with one until it is set.
To give a user several responsibilities, enter one row per responsibility. The account columns (password, description, dates, email, employee) are taken from the first row of each user in the file. For an existing user, the account is updated when the password, Description or User End Date changes. A responsibility the user already holds directly is updated with the Responsiblity Start, Responsiblity End and Assignment Description of the row; any other responsibility is added as a direct assignment.
To link the user to an employee, enter the Business Group, Person and Employee Number. If no such person exists in the business group, an employee is created from Last Name, First Name, Gender, Date Of Birth and Email Address, hired on the User Start Date. Leave Business Group empty for an account without an employee.
Step 4 – Validate and Save
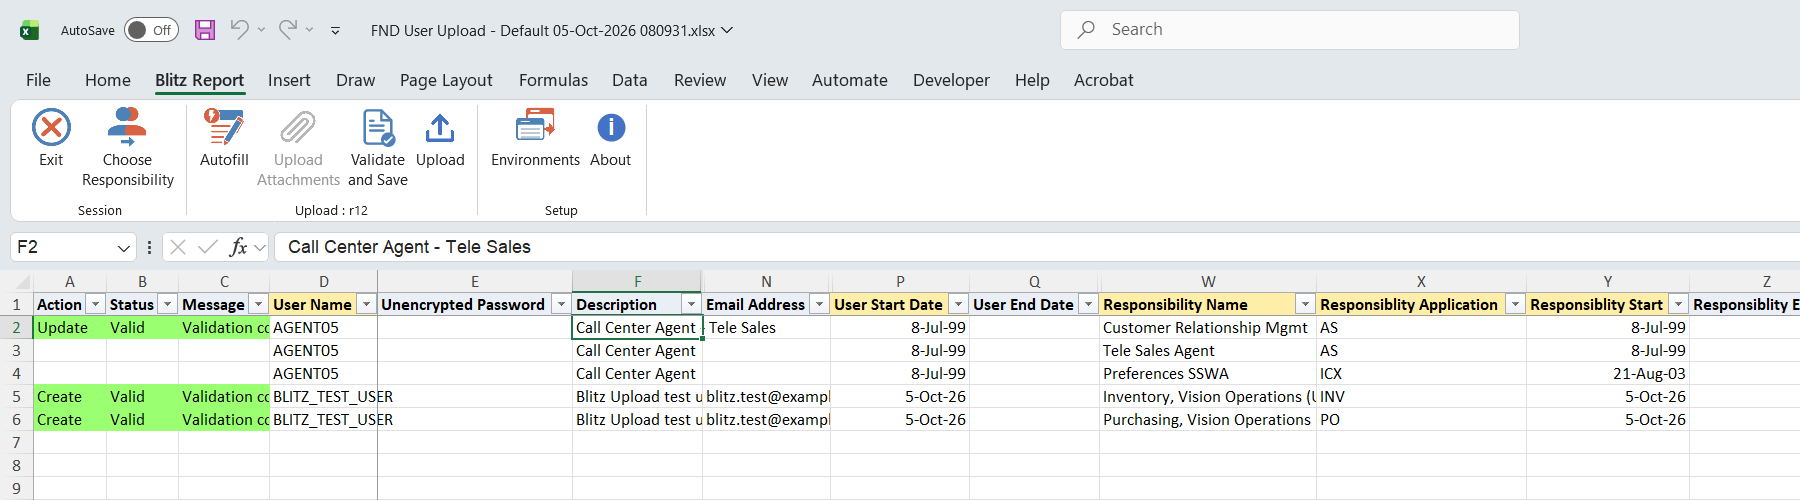
Click Validate and Save. This checks for missing required values and saves the file. Correct any rows it flags before uploading.
Step 5 – Upload the file
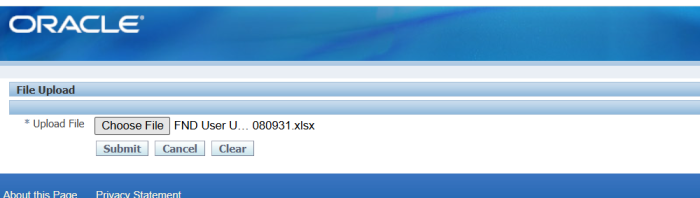
In Blitz Report click Upload and select the saved file. This submits the upload request, which creates or updates each user and assigns the responsibilities.
Step 6 – Review the result report
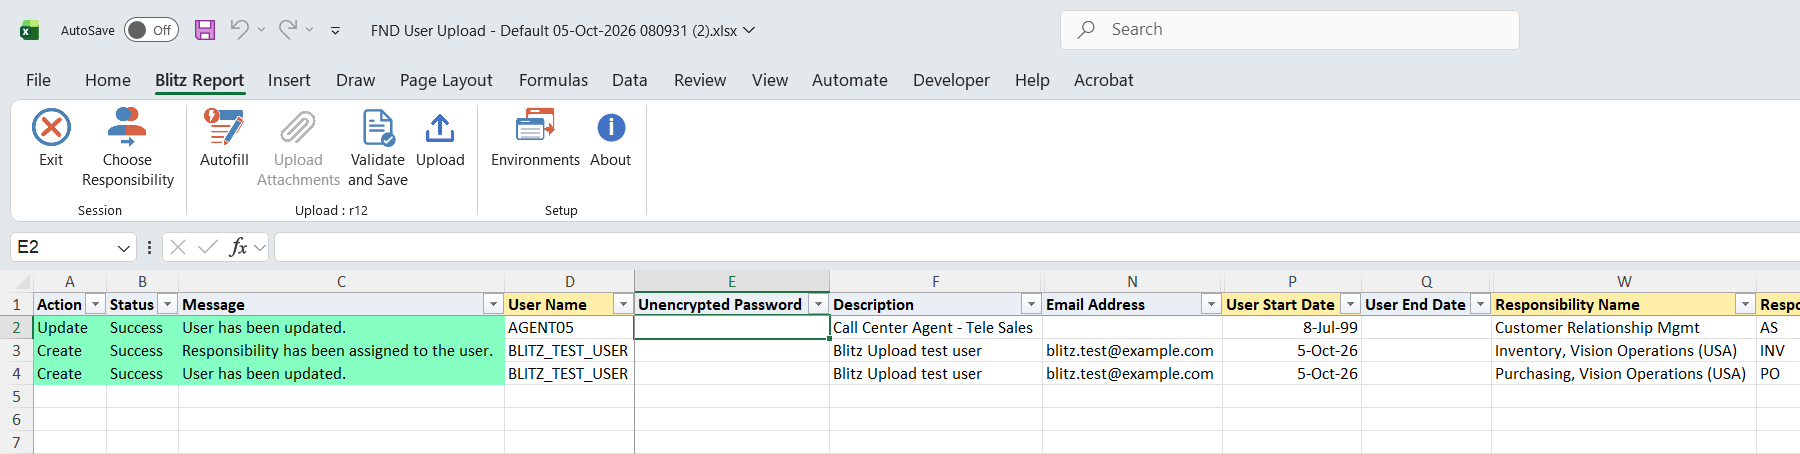
When the request completes, a result report opens listing every uploaded row with its status and message.
What’s produced
- New or updated user accounts with direct responsibility assignments in the Standard security group, and, where a Business Group is entered, linked or newly created employees.
- A result report listing every row with a status (success or error) and a message such as “New user created.”, “Responsibility has been assigned to the user.” or “User has been updated.”. The password column is always empty.
Common questions
How do I create a new user with the same responsibilities as an existing one?
Download the existing user in Create, Update mode, change the User Name on every row to the new name, and clear Business Group, Person and Employee Number (or enter the new user’s employee), so the new account is not linked to the existing user’s employee. Enter a password if the user signs in with one, then Validate and Save and Upload. The new user is created with all the responsibilities of the downloaded rows.
How do I set or reset a password?
Enter it in the Unencrypted Password column. Leaving the column empty on an existing user keeps the current password.
How do I deactivate a user or a responsibility?
Enter a User End Date to end-date the account, or a Responsiblity End to end-date one assignment. Users and assignments are never deleted.
Does Upload Mode Create stop changes to existing users?
No. Upload Mode only decides whether the download contains existing users. A row for an existing user name updates that user in either mode.
Why are some of a user’s responsibilities not in the download?
The download lists direct assignments only. Responsibilities inherited through roles are not listed, although the Has Access to Responsibility filter finds users holding them.
Do I have to fill in the employee columns?
No. They are used only when a Business Group is entered.
Troubleshooting
| Message | Cause | What to do |
|---|---|---|
| Responsibility Name is invalid / Responsiblity Application is invalid | The responsibility does not exist, or the application is not the one that owns it. | Pick the responsibility from the list, then pick its application from the list. |
| Business Group is invalid / Person is invalid / Employee Number is invalid | The person is not a current person of that business group, or the employee number does not belong to the person. | Pick Business Group, Person and Employee Number from their lists, in that order. |
| Gender is invalid | The value is not a gender code. | Pick the code from the list (for example M or F). |
| An Oracle error text, for example about the password | The Oracle user or employee API rejected the row, for example a password that does not meet the password rules. | Correct the value named in the message and upload the row again. |
SQL 60 lines
select y.* from ( select null action_, null status_, null message_, null modified_columns_, fu.user_name, null unencrypted_password, fu.description, papf.business_group, papf.full_name person, papf.employee_number, papf.first_name, papf.last_name, papf.sex gender, papf.date_of_birth date_of_birth, fu.email_address, fu.fax, fu.start_date user_start_date, fu.end_date user_end_date, fu.last_logon_date last_logon_date, xxen_util.user_name(fu.created_by) created_by, xxen_util.client_time(fu.creation_date) user_creation_date, xxen_util.user_name(fu.last_updated_by) user_last_updated_by, xxen_util.client_time(fu.last_update_date) user_last_update_date, frv.responsibility_name, frv.application_name responsiblity_application, frv.start_date responsiblity_start, frv.end_date responsiblity_end, frv.description assignment_description, 0 upload_row from fnd_user fu, (select pbg.name business_group, papf.* from per_all_people_f papf, per_business_groups pbg where papf.business_group_id=pbg.business_group_id and nvl(papf.effective_end_date,sysdate)>=trunc(sysdate)) papf, ( select furgd.user_id, frv.responsibility_name, fa.application_short_name application_name, furgd.start_date, furgd.end_date, furgd.description from fnd_responsibility_vl frv, fnd_application fa, fnd_user_resp_groups_direct furgd where 2=2 and frv.application_id=fa.application_id and frv.application_id=furgd.responsibility_application_id and frv.responsibility_id=furgd.responsibility_id ) frv where 1=1 and fu.employee_id=papf.person_id(+) and fu.user_id=frv.user_id(+) ) y |
Parameters 8
| Parameter | Type | List of values SQL | |
|---|---|---|---|
| Upload Mode | LOV |
| |
| User Name | LOV |
| |
| Has Access to Responsibility | LOV |
| |
| Has Access to Application | LOV |
| |
| Active only | LOV |
| |
| Creation Date From | Date |
| |
| Creation Date To | Date |
| |
| Created within days | Number |
|