1 Test environment
2 Install Java 17
3 Install ORDS
3.1 Create ords config and logs directories
3.2 Create an environment file
3.3 Create a self signed certificate
3.4 Convert the private key to DER format
3.5 Apply the environment file
3.6 Run the ords installer
4 Create ORDS startup and shutdown scripts
5 Configure firewall
6 Enable a schema for ORDS
7 Start ORDS
8 Access the ORDS url
9 Using an existing ORDS installation (e.g. for APEX)
10 Configure Blitz Report to use ORDS
11 Troubleshooting
11.1 ORDS OAuth token request returns HTTP 503 service_unavailable
11.2 ORDS connection from Excel returns 404 “Not Found”
11.3 ORDS OAuth2 calls return HTTP 401 with a valid token
11.4 Blitz FSG balance refresh fails with HTTP Status 500 from Tomcat when using ORDS
12 Useful links
Introduction
This post explains how to install and configure ORDS in the standalone mode. Standalone mode relies on the built-in Jetty HTTP server and does not require installation of other technology stack components.
Note: if you’re setting up ORDS for use with Blitz Report, Oracle Database 12.2 or later is required.
1 Test environment
I installed ORDS on top of the following technology stack:
Operating system: Oracle Linux 8
Oracle Database 19c with one pluggable database
Note: This guide also works on Oracle Linux 7, which is still common for EBS R12.2 environments. See the note in section 3.3 for an OpenSSL compatibility adjustment required on OL7.
Prerequisites: Root or sudo access is required for creating directories under /u01, setting file ownership (chown), and configuring the firewall. The ORDS installation and configuration itself runs as the applmgr user.
2 Install Java 17
Download Java SE Development Kit 17.0.12 Linux x64 Compressed Archive
cd /u01 cp /downloads/jdk-17.0.12_linux-x64_bin.tar.gz . tar -xzvf jdk-17.0.12_linux-x64_bin.tar.gz mv jdk-17.0.12/ jdk chown -R applmgr:oinstall jdk rm -f jdk-17.0.12_linux-x64_bin.tar.gz |
The JDK 17 home is: /u01/jdk
3 Install ORDS
mkdir -p /u01/ords chown -R applmgr:oinstall /u01/ords cd /u01/ords wget https://download.oracle.com/otn_software/java/ords/ords-latest.zip unzip ords-latest.zip rm -f ords-latest.zip |
3.1 Create ords config and logs directories
mkdir -p /u01/ords_config mkdir -p /u01/ords_config/logs chown -R applmgr:oinstall /u01/ords_config |
3.2 Create an environment file
su - applmgr vi ~/ORDS.env export JAVA_HOME=/u01/jdk export ORDS_HOME=/u01/ords/ export ORDS_CONFIG=/u01/ords_config export PATH=/u01/ords/bin:$PATH export _JAVA_OPTIONS="-Xms1126M -Xmx1126M" |
3.3 Create a self signed certificate
mkdir -p /u01/ords_config/certificates cd /u01/ords_config/certificates openssl req -x509 -newkey rsa:2048 -sha256 -days 7300 -nodes -keyout ords_private_key.pem -out ords_certificate.pem -subj "/CN=r122.localdomain/O=Enginatics/OU=Development" -addext "subjectAltName=DNS:r122.localdomain" |
Oracle Linux 7 / OpenSSL 1.0.x: The -addext option requires OpenSSL 1.1.1 or later. On older systems (e.g. OL7 with OpenSSL 1.0.2), use a config file instead:
cat > /tmp/ords_cert.cnf << 'EOF' [req] default_bits = 2048 prompt = no default_md = sha256 distinguished_name = dn x509_extensions = v3_req [dn] CN = r122.localdomain O = Enginatics OU = Development [v3_req] subjectAltName = DNS:r122.localdomain EOF openssl req -x509 -newkey rsa:2048 -sha256 -days 7300 -nodes -keyout ords_private_key.pem -out ords_certificate.pem -config /tmp/ords_cert.cnf rm -f /tmp/ords_cert.cnf |
Replace r122.localdomain with your server’s hostname in both approaches.
3.4 Convert the private key to the DER format required by ORDS installer
openssl pkcs8 -topk8 -inform PEM -outform DER -in ords_private_key.pem -out ords_private_key.der -nocrypt openssl x509 -inform PEM -outform DER -in ords_certificate.pem -out ords_certificate.der |
3.5 Apply the environment file
su - applmgr source ~/ORDS.env |
3.6 Run the ords installer
In the example below I changed protocol to HTTPS and provided the path to the self-signed certificate generated earlier.
[applmgr@r122_Local ~]$ ords --config /u01/ords_config install

Picked up _JAVA_OPTIONS: -Xms1126M -Xmx1126M

ORDS: Release 25.3 Production on Wed Oct 29 12:29:31 2025

Copyright (c) 2010, 2025, Oracle.

Configuration:
  /u01/ords_config

The configuration folder /u01/ords_config does not contain any configuration files.

Oracle REST Data Services - Interactive Install

  Enter a number to select the TNS net service name to use. Total TNS net service names are 12. Showing only the first 9 TNS net service names from /u01/install/APPS/fs1/inst/apps/EBSDB_apps/ora/10.1.2/network/admin/tnsnames.ora. Additional option to Specify the database connection.
    [1] EBSDB        SERVICE_NAME=ebs_EBSDB
    [2] EBSDB_BALANCE SERVICE_NAME=ebs_EBSDB
    [3] EBSDB_FO     SERVICE_NAME=ebs_EBSDB
    [4] EBSDB_FO_PATCH SERVICE_NAME=EBSDB_ebs_patch
    [5] EBSDB_PATCH  SERVICE_NAME=EBSDB_ebs_patch
    [6] FNDFS_APPLTOP_APPS SID=FNDFS
    [7] FNDFS_APPS   SID=FNDFS
    [8] FNDFS_APPS.EXAMPLE.COM SID=FNDFS
    [9] FNDFS_EBSDB_APPS SID=FNDFS
    [S] Specify the database connection
    [T] Specify the TNS net service name
  Choose [1]: 1 <-- select your TNS alias
  Provide database user name with administrator privileges.
    Enter the administrator username: sys <-- database admin user
  Enter the database password for SYS AS SYSDBA: <-- enter SYS password

Retrieving information.
ORDS is not installed in the database. ORDS installation is required.

  Enter a number to update the value or select option A to Accept and Continue
    [1] Connection Type: TNS
    [2] TNS Connection: TNS_NAME=EBSDB TNS_FOLDER=/u01/install/APPS/fs1/inst/apps/EBSDB_apps/ora/10.1.2/network/admin
           Administrator User: SYS AS SYSDBA
    [3] Database password for ORDS runtime user (ORDS_PUBLIC_USER):
    [4] ORDS runtime user and schema tablespaces:  Default: SYSAUX Temporary TEMP
    [5] Additional Feature: Database Actions
    [6] Configure and start ORDS in Standalone Mode: Yes
    [7]    Protocol: HTTP
    [8]       HTTP Port: 8080
    [A] Accept and Continue - Create configuration and Install ORDS in the database
    [Q] Quit - Do not proceed. No changes
  Choose [A]: 7 <-- change protocol
  Enter a number to select the protocol
    [1] HTTP
    [2] HTTPS
  Choose [1]: 2 <-- select HTTPS
  Enter the HTTPS port [8443]:8443 <-- HTTPS port
  Enter a number to select the certificate type
    [1] Use self-signed certificate (generates automatically)
    [2] Use my SSL certificate (requires SSL certificate and SSL certificate private key)
  Choose [1]: 2 <-- use custom certificate
  Enter the path for the SSL Certificate: /u01/ords_config/certificates/ords_certificate.der
  Enter the path for the SSL Certificates private key: /u01/ords_config/certificates/ords_private_key.der
  Enter a number to update the value or select option A to Accept and Continue
    [1] Connection Type: TNS
    [2] TNS Connection: TNS_NAME=EBSDB TNS_FOLDER=/u01/install/APPS/fs1/inst/apps/EBSDB_apps/ora/10.1.2/network/admin
           Administrator User: SYS AS SYSDBA
    [3] Database password for ORDS runtime user (ORDS_PUBLIC_USER):
    [4] ORDS runtime user and schema tablespaces:  Default: SYSAUX Temporary TEMP
    [5] Additional Feature: Database Actions
    [6] Configure and start ORDS in Standalone Mode: Yes
    [7]    Protocol: HTTPS
    [8]       HTTPS Port: 8443
    [9]    Certificate Type: Use my SSL Certificate
    [10]      Path for the SSL Certificate: /u01/ords_config/certificates/ords_certificate.der
    [11]      Path for the SSL Certificate private key: /u01/ords_config/certificates/ords_private_key.der
    [A] Accept and Continue - Create configuration and Install ORDS in the database
    [Q] Quit - Do not proceed. No changes
  Choose [A]: A <-- accept and install
The setting named: db.connectionType was set to: tns in configuration: default
The setting named: db.tnsAliasName was set to: EBSDB in configuration: default
The setting named: db.tnsDirectory was set to: /u01/install/APPS/fs1/inst/apps/EBSDB_apps/ora/10.1.2/network/admin in configuration: default
The setting named: db.username was set to: ORDS_PUBLIC_USER in configuration: default
The setting named: db.password was set to: ****** in configuration: default
The setting named: feature.sdw was set to: true in configuration: default
The global setting named: database.api.enabled was set to: true
The setting named: restEnabledSql.active was set to: true in configuration: default
The global setting named: standalone.https.port was set to: 8443
The global setting named: standalone.https.cert was set to: /u01/ords_config/certificates/ords_certificate.der
The global setting named: standalone.https.cert.key was set to: /u01/ords_config/certificates/ords_private_key.der
The global setting named: standalone.doc.root was set to: /u01/ords_config/global/doc_root
The setting named: security.requestValidationFunction was set to: ords_util.authorize_plsql_gateway in configuration: default
2025-10-29T12:30:13.214Z INFO        Created folder /u01/ords_config/certificates/logs
2025-10-29T12:30:13.217Z INFO        The log file is defaulted to the current working directory located at /u01/ords_config/certificates/logs
2025-10-29T12:30:13.411Z INFO        Installing Oracle REST Data Services version 25.3.1.r2891312 in EBSDB
2025-10-29T12:30:19.612Z INFO        ... Verified database prerequisites
2025-10-29T12:30:20.634Z INFO        ... Created Oracle REST Data Services proxy user
2025-10-29T12:30:21.610Z INFO        ... Created Oracle REST Data Services schema
2025-10-29T12:30:23.759Z INFO        ... Granted privileges to Oracle REST Data Services
2025-10-29T12:30:34.947Z INFO ... Created Oracle REST Data Services database objects |
Non-interactive alternative: Instead of the interactive installer, you can run the install and configure HTTPS using command-line options. This is useful for scripted or automated deployments:
source ~/ORDS.env # Install ORDS into the database (enter the SYS password when prompted) ords --config /u01/ords_config install --admin-user "sys as sysdba" --db-tns-alias EBSDB --db-tns-dir /u01/install/APPS/fs1/inst/apps/EBSDB_apps/ora/10.1.2/network/admin --log-folder /u01/ords_config/logs # Configure HTTPS ords --config /u01/ords_config config set standalone.https.port 8443 ords --config /u01/ords_config config set standalone.https.cert /u01/ords_config/certificates/ords_certificate.der ords --config /u01/ords_config config set standalone.https.cert.key /u01/ords_config/certificates/ords_private_key.der ords --config /u01/ords_config config set standalone.doc.root /u01/ords_config/global/doc_root |
For fully unattended installs, you can pipe the password via --password-stdin. See the ORDS documentation for details.
4 Create ORDS startup and shutdown scripts
vi start_ords.sh

export JAVA_HOME=/u01/jdk
export ORDS_HOME=/u01/ords/
export ORDS_CONFIG=/u01/ords_config
export PATH=/u01/ords/bin:$PATH
export _JAVA_OPTIONS="-Xms1126M -Xmx1126M"
LOGFILE=/u01/ords_config/logs/ords-`date +"%Y""%m""%d"`.log
nohup ${ORDS_HOME}/bin/ords --config ${ORDS_CONFIG} serve >> $LOGFILE 2>&1 &
echo "View log file with : tail -f $LOGFILE"


vi stop_ords.sh

#!/bin/bash
kill -9 `ps -ef | grep [o]rds.war | awk '{print $2}'`

chmod u+x start_ords.sh stop_ords.sh |
5 Configure firewall
Add the ORDS https port to the allowed ports:
firewall-cmd --permanent --zone=your_custom_zone --add-port=8443/tcp firewall-cmd --reload |
6 Enable a schema for ORDS
The Blitz Report installation script automatically enables the custom application schema (e.g. XXEN) for ORDS during installation. This step is only needed if you want to enable a schema manually, for example when troubleshooting or configuring ORDS for other applications.
The ORDS schema serves as a lightweight proxy — it only needs execute permission on a single APPS package and does not require direct access to any EBS tables. For security reasons, the Blitz Report installation always uses the custom application schema for ORDS, never the APPS schema.
Run the following command, replacing XXXX with the schema name you want to use.
sqlplus apps/****

BEGIN
  ords_admin.enable_schema(
    p_enabled             => TRUE,
    p_schema              => 'XXXX',
    p_url_mapping_type    => 'BASE_PATH',
    p_url_mapping_pattern => NULL,
    p_auto_rest_auth      => TRUE
  );
END;
/ |
For Blitz Report, enable the custom application schema (e.g. XXEN). With BASE_PATH mapping and a NULL pattern the schema is exposed under /ords/<lowercased schema>/ — for schema XXEN that is /ords/xxen/, which is the base path used by the XXEN_WEBSERVICE_ORDS_URL profile option (see sections 10 and 11.2).
7 Start ORDS
./start_ords.sh |
8 Access the ORDS url
The URL depends on your server host name, protocol and port that you chose. In my case it was:
https://r122.localdomain:8443/ords/ |
Important: The URL must use the exact hostname specified in the SSL certificate’s CN/SAN field (e.g. r122.localdomain). Connecting via localhost or an IP address will result in an “HTTP ERROR 400 Invalid SNI” error due to ORDS SNI (Server Name Indication) validation.
9 Using an existing ORDS installation (e.g. for APEX)
If your environment already has ORDS installed — for example, for Oracle APEX — you do not need to install ORDS again. The Blitz Report installation script will automatically enable the custom application schema and configure the required endpoints.
10 Configure Blitz Report to use ORDS
Once ORDS is installed and reachable, Blitz Report has to be pointed at it. The Blitz Report installation/upgrade script does all of the following automatically when the connection type is left blank — the steps are listed here for verification, or for switching an existing instance from ISG or mod_plsql.
1. Set the connection type to ORDS. ORDS is the default transport, selected by leaving the Blitz Report Webservice Connection Type profile option (XXEN_WEBSERVICE_CONNECTION_TYPE) blank. The only valid non-blank values are ISG and MOD_PLSQL — do not set the literal value ORDS, which is treated as a non-default transport and causes the automatic ORDS configuration below to be skipped.
2. Run the Blitz Report installation/upgrade. With the profile blank, the installer enables the custom application schema (e.g. XXEN) for ORDS (section 6) and runs configure_ords.sql as that custom schema, registering the xxen_webservices module, its REST endpoints and the OAuth2 client. The endpoints are then reachable under /ords/<schema-alias>/ — for schema XXEN, /ords/xxen/.
3. Set the ORDS URL. Set the Blitz Report Webservice ORDS URL profile option (XXEN_WEBSERVICE_ORDS_URL) to the base path — protocol, host, port, ORDS context and schema alias, ending with / and without the module name:
https://r122.localdomain:8443/ords/xxen/ |
If the add-in later returns a 404, this URL is almost always the cause — see section 11.2.
4. Validate. Run the DBA ORDS Configuration Validation report. It confirms the schema enablement, module, endpoints and OAuth2 client are all in place, and prints the exact fix SQL for anything missing.
11 Troubleshooting
The notes below apply to all ORDS deployments — standalone Jetty, Tomcat, or Weblogic. The Blitz Report-specific ORDS configuration is applied automatically by the upgrade script; this section covers cases where it doesn’t go through cleanly.
11.1 ORDS OAuth token request returns HTTP 503 service_unavailable
Symptom: ORDS REST endpoints are reachable, but requests to the OAuth token endpoint fail with:
Status: 503
Response: {"error":"service_unavailable","error_description":"Service Unavailable"} |
Cause: The ORDS / APEX metadata in the database is incomplete or corrupted, so the OAuth token service cannot initialise even though the rest of ORDS is responding.
Fix: Run the ORDS repair command. It must be executed as SYS AS SYSDBA — running it as an application schema fails because the user does not have the privileges required to repair the internal APEX metadata objects.
ords --config /u01/ords_config install repair |
Replace /u01/ords_config with your own ORDS configuration directory (see section 3.1). When prompted, connect as sys as sysdba.
After the repair completes, restart ORDS (see section 7). OAuth token generation should then succeed.
11.2 ORDS connection from Excel returns 404 “Not Found”
The Blitz Report Excel add-in shows a popup titled Authenticating your connection via SSO with a 404 page from “REST Data Services”. This means ORDS is reachable but the URL path is wrong, most commonly the schema alias, and sometimes the pool prefix, host, or context.
Fix: set the Blitz Report Webservice ORDS URL profile option (XXEN_WEBSERVICE_ORDS_URL) to the correct base path, ending with /:
protocol://ords-host:ords-port/ords-context/schema-alias/ |
Example: https://ordstest.example.com:8443/ords/afs/
Find the correct URL:
- Run the DBA ORDS Configuration Validation report. Section 6. Configuration shows the schema alias and derived URL.
- Or log in to SQL Developer Web as the Blitz custom schema user (XXEN, XXAFS, etc.) and navigate to REST > Modules > xxen_webservices > Edit Module. The Preview URL shows the full path; remove the trailing
xxen_webservices/to get the profile value. - Or, on the ORDS host, check the Tomcat access log (
$CATALINA_BASE/logs/localhost_access_log.YYYY-MM-DD.txt) for any successful response under/ords/. The path before/xxen_webservices/is the correct base URL.
The installer cannot always guess the URL: the ORDS server may run on a different host than the EBS app server, on a custom port, or behind a reverse proxy. The schema alias is typically the lowercased custom schema name (e.g. xxen for schema XXEN), but a DBA may have configured it differently when running ords_admin.enable_schema — for example schema XXAFS exposed under alias /afs/. Multi-pool ORDS deployments add a pool prefix between /ords/ and the schema alias.
11.3 ORDS OAuth2 calls return HTTP 401 with a valid token
OAuth2 token requests succeed (HTTP 200 with an access_token) but subsequent calls to /xxen_webservices/* return 401 Unauthorized. This typically means another module in the same parsing schema has a pre-existing URL-pattern privilege (e.g. pattern /* requiring a custom role) that intercepts xxen_webservices calls. ORDS enforces every matching privilege, so the xxen_webservices OAuth client must hold that privilege’s roles too.
Fix: run the DBA ORDS Configuration Validation report. Section 5. URL-pattern Privileges lists every privilege whose pattern intercepts /xxen_webservices/* calls and flags any required role not held by the OAuth client. Each Error row’s Detail column prints the exact oauth.grant_client_role(...) SQL needed to fix it. Example:
-- Run as the parsing schema (e.g. XXAFS, XXEN): begin oauth.grant_client_role( p_client_name => 'xxen_webservices', p_role_name => 'afs_role'); commit; end; / |
No ORDS or Tomcat restart is required — ORDS reads OAuth role grants on every token validation. Reversible via oauth.revoke_client_role(...).
11.4 Blitz FSG balance refresh fails with HTTP Status 500 from Tomcat when using ORDS
When refreshing a large FSG workbook over an ORDS connection deployed on Apache Tomcat, Excel may show a “Blitz FSG – Webservice Error” dialog with HTTP status: 500 and an HTML response body that begins with <!doctype html> and contains Type Exception Report. The error appears just after the progress dialog reaches the “Balance formula details gathered, constructing webservice” stage.
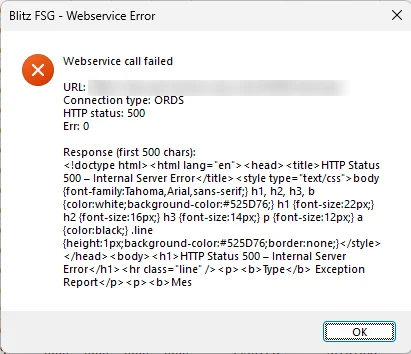
Cause: The size of the POST body sent by Blitz FSG to the ORDS endpoint exceeds Tomcat’s maxPostSize limit (default 2 MB / 2,097,152 bytes). A workbook containing several thousand balance() formulas with many account segments and long ledger names can easily produce a single POST body larger than 2 MB.
Fix: Raise Tomcat’s POST body limits. Edit $CATALINA_HOME/conf/server.xml and add or update these attributes on the HTTP/HTTPS <Connector> that serves the ORDS port:
maxPostSize="-1"— disables the 2 MB POST body limit. Use a specific larger value such as52428800(50 MB) if an unlimited body is not desirable.maxSwallowSize="-1"— prevents Tomcat from aborting partial uploads at 2 MB.connectionTimeout="600000"— raises the 20-second socket timeout to 10 minutes for long-running balance calculations.
Restart Tomcat after the change.
Workaround: If you cannot change the Tomcat configuration (e.g. no access to server-side files), reduce the batch size so each POST stays well below 2 MB by lowering these profile options at Site level:
- Blitz FSG Initial Batch Size — e.g. 1000
- Blitz FSG Maximum Batch Size — e.g. 5000
Lowering the batch size means the FSG framework needs more round-trips, which reduces overall throughput. Prefer the Tomcat fix above when possible.
Diagnosis tip: If the underlying error is something other than POST body size (e.g. ORDS connection pool timeout or a PL/SQL exception in xxen_fsg.balance), the actual stack trace is logged to Tomcat’s catalina.out and localhost..log. Check those logs before raising maxPostSize if the fix above does not resolve the issue.
12 Useful links
You may find more information on ORDS on these links:
https://redstack.dev/2022/05/17/installing-oracle-rest-data-services/
https://blog.cloudnueva.com/running-ords-standalone-mode
https://www.thatjeffsmith.com/archive/2024/06/ords-installs-upgrades-the-tns-edition/
https://oracle-base.com/articles/misc/oracle-rest-data-services-ords-installation-on-tomcat-22-onward
https://oracle-base.com/articles/misc/oracle-rest-data-services-ords-standalone-mode-22-onward
https://docs.oracle.com/en/database/oracle/oracle-rest-data-services/25.2/ordig/installing-and-configuring-oracle-rest-data-services.html#GUID-2D13E9CD-EB0C-4CE7-82B8-45BD5C62897B